
How to Extract Data from a LOREX Fusion 4K N846A6-Z NVR System
The LOREX Fusion 4K N846A6-Z NVR System (Network Video Recorder) is a surprisingly sparse and light system for recording security camera footage.
A client was unable to locate her password and required data from the device for a divorce proceeding. The device was FedEx’d to me and my first step was to remove the internal 2TB Seagate SkyHawk Lite (ST2000VX007/2AY102-515) 3.5″ hard drive for cloning.
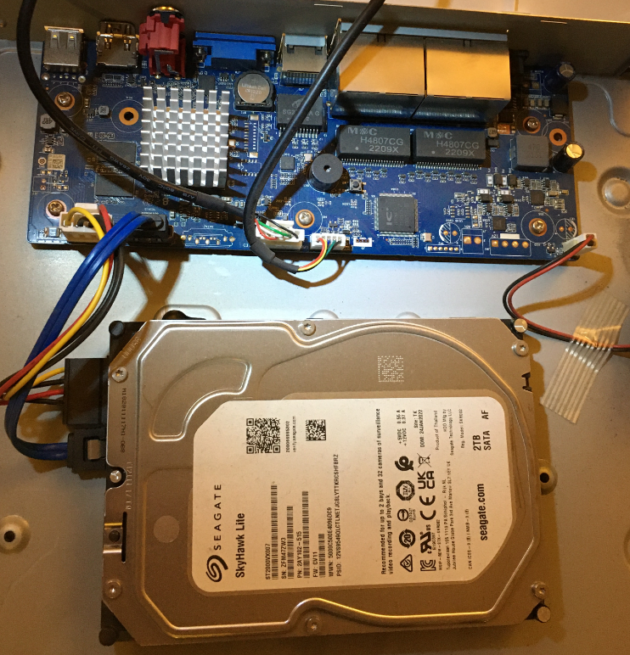
Checking the drive in hex, I noted that the drive is in proprietary DHFS 4.1 (Dahua File System) format.

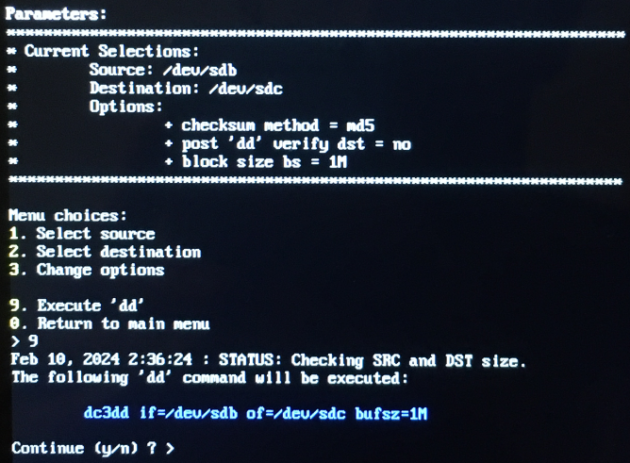
I elected to clone the drive prior to proceeding any further in the event that something were to go awry. In order to clone the drive sector-by-sector, I used OSFClone by PassMark. OSFClone is a remarkable tool for creating disk images or cloning drives which prevents against command-line typos.
With the clone completed, the drive was inserted back into the unit and powered on. I used the VGA cable with an old monitor, but nothing would display. The monitor read “Input Not Supported.” So, I tried another more modern monitor and used the HDMI port instead. That worked and it led me to the password prompt with the “admin” username. I tried all of the default passwords to no avail. I also tried the recommended one-time password utilities that generate a password based on the day (per this guide). Those, too, did not work. So, I set out to locate the reset button on the motherboard.
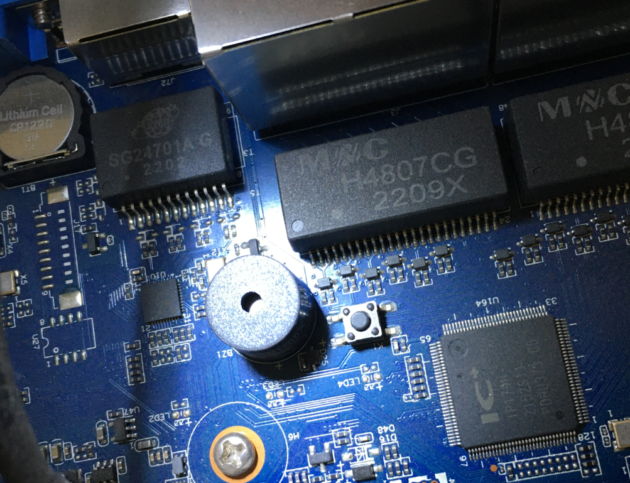
On this particular model, the reset button is in the middle of the board near the PC speaker and it is unlabeled. With the power off, hold down the reset button and power the unit on. Continue holding down the reset button for about 30 seconds.
I tested the drive using Stellar Photo Recovery to see if it could detect and carve/recover the footage and it was able to carve and recover data. So, that is also an option if for whatever reason the Reset option didn’t work. With the clone successfully completed, I was able to proceed without fear of destroying the recorded footage on the original drive.
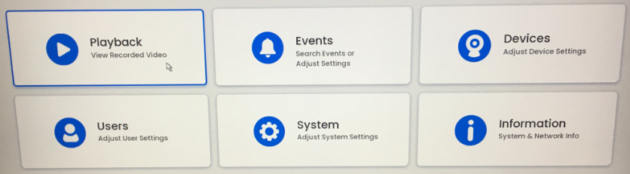
Once reset, the system reverts to the Welcome screen and the unit can be configured with a new password. I chose a Local Setup since I am only doing data recovery. In the Playback menu, recorded footage can be reviewed and one can check for what data exists on any particular day.
There is a small blue dotted line underneath each day that contains potential footage. I was able to determine that there was only 7 days worth of footage. The entire drive was full. Given the high-quality nature of the footage, this is not too surprising given that there was 8 cameras and only a 2TB drive installed.
Under the System menu, there is an option to Backup (Save Your Recordings).
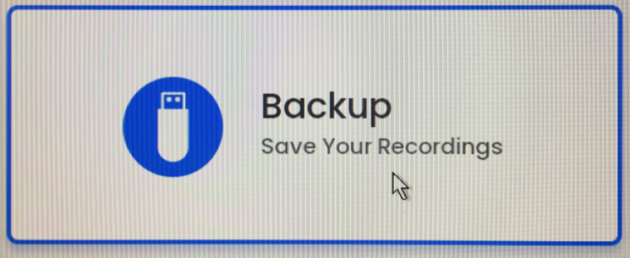
Any external device, either flash or external self-powered USB drive can be installed directly into the unit. It can be formatted either FAT32 or NTFS. This is the way to extract and essentially convert the files from the proprietary DHFS to regular FAT32/NTFS for use on a standard computer.
The interface is a little clunky and has an important limitation that isn’t very obvious: it can only extract 1,024 files at a time. So, if you try to select a large date range and it exceeds the 1,024 limit, it will give you an error message: “Please shorten the search time!”
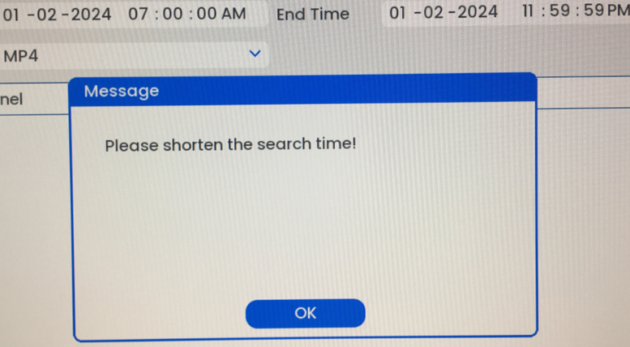
It will still display some data, so it appears at first glance that the error message is merely a suggestion. It is not! It will be missing cameras and the data will be otherwise truncated. In my particular extraction with 8 cameras, it was necessary to perform backups in 6 hour increments. Each backup took anywhere from 2 to 4 hours, depending on the size.